


Table of Contents
- Essential Pre-Ride Inspection Before Long-Distance Travel
- Motorcycle Pre-Ride Inspection Checklist for Road Trips
- Motorcycle Maintenance Before a Road Trip
- Motorcycle Road Trip Tool Kit: What to Pack
- Motorcycle Touring Packing List and Load Balance
- Comfort Setup and Fatigue Management for Extended Rides
- Route Planning, Weather, and Communications
- Frequently Asked Questions
Last Updated: October 9, 2026
Essential Pre-Ride Inspection Before Long-Distance Travel
When you prepare motorcycle long distance travel, start with a thorough pre-ride inspection. It catches problems before they strand you 200 miles from home, and most long-ride breakdowns happen because riders skip or rush it.
Inspect in daylight on a level surface, allowing at least 30 minutes for tires, brakes, lights, and fluids.
Check Your Tires, Pressure, and Tread Depth
Your tires are your only contact with the pavement, and bad tires cause more road-trip problems than almost any other component.
Check tire pressure cold with a quality gauge, gas station pumps are often inaccurate, and find the correct pressure in your owner’s manual.
For tread depth, use the penny test: insert a penny upside down into the tread.
Check both tires’ full circumference for cracks, cuts, or sidewall bulges, any of these means replacement.
Many riders overlook uneven wear. If the center of the tire is worn more than the edges, you’re running too much pressure. If the edges are worn more than the center, pressure is too low. Fix this before your trip, uneven wear gets worse with distance.
Inspect Brakes, Calipers, and Brake Pads
Your brakes must work perfectly on long rides through unfamiliar terrain.
Squeeze the levers: they should feel firm, not spongy.
Check pad thickness through the caliper window, 3mm minimum. Thinner pads reduce braking power and lengthen stopping distance.
Run a finger across each rotor: it should feel smooth, with no deep grooves.
Check for fluid leaks around calipers and master cylinders, even a small leak can cause brake failure.
Test the brakes gently in a parking lot.
Test Lights, Mirrors, and Visibility
Long-distance riding means dawn, dusk, and nighttime conditions, so your lights must keep you visible.
The headlight should be bright and aimed to light the road without blinding oncoming traffic.
With someone behind you, test the tail and brake lights, both should be bright red.
All four turn signals should blink steadily; slow or no blinking means a bad bulb or connection.
Keep reflectors clean and unbroken so other riders see you in low light.
Motorcycle Pre-Ride Inspection Checklist for Road Trips
A written checklist keeps you organized. Print this one and use it before every long ride.
| Inspection Item | Check | Status |
|---|---|---|
| Tire pressure (cold) | Compare to manual | Pass / Fail |
| Tire tread depth | Penny test, 4/32″ minimum | Pass / Fail |
| Tire damage | Cracks, cuts, bulges | Pass / Fail |
| Brake lever feel | Firm, not spongy | Pass / Fail |
| Brake pad thickness | 3mm minimum | Pass / Fail |
| Brake rotor condition | Smooth, no warping | Pass / Fail |
| Brake fluid level | Check reservoirs | Pass / Fail |
| Headlight | Bright, aimed correctly | Pass / Fail |
| Tail light | Bright, works | Pass / Fail |
| Brake light | Bright, works | Pass / Fail |
| Turn signals | All four blink | Pass / Fail |
| Mirrors | Clean, secure, adjusted | Pass / Fail |
| Oil level | Check with dipstick | Pass / Fail |
| Coolant level | Check reservoir | Pass / Fail |
| Brake fluid level | Check reservoirs | Pass / Fail |
| Chain tension | 1/2 to 1 inch play | Pass / Fail |
| Chain lubrication | Clean, not dry | Pass / Fail |
| Battery | Secure, no corrosion | Pass / Fail |
Fluids: Oil, Coolant, and Brake Fluid
Check all three fluids before every long ride to keep the engine running cool and smooth.
Check oil with the dipstick when the bike is upright and cool; the level should sit between the min and max marks.
Check the coolant reservoir cold, never hot, as pressure can cause serious burns.
Check both brake fluid reservoirs; the level should be near the maximum line.
Never mix brake fluid types. If you’re unsure what type your bike uses, check the owner’s manual. Using the wrong fluid can damage your brake system and cause complete brake failure.
Chain Tension and Drive System
Your chain or shaft drive transfers engine power to the rear wheel.
For chain drive, push up midway between the sprockets: 1/2 to 1 inch of play.
Lube a dry or rusty chain, it will otherwise rust and wear quickly, and wipe off the excess.
Spin the wheel and inspect the whole chain; a kink or broken link means replacement before you ride.
Battery and Electrical System
Your battery powers the starter and electrical components. A weak battery will leave you stranded.
Check terminals are clean and tight. White, blue, or green powder means corrosion, disconnect the battery, clean the terminals with a wire brush, and reconnect firmly.
A cracked battery case means it’s leaking and needs replacement.
Start the bike and verify lights, signals, horn, and gauges. Anything dead usually means a loose connection or bad bulb.
Motorcycle Maintenance Before a Road Trip
Beyond the pre-ride inspection, some maintenance tasks take more time but prevent major problems on the road.
Oil and Oil-Filter Changes
Fresh oil keeps your engine clean and lubricated; old oil breaks down and loses its protective properties.
Most bikes need an oil change every 3,000 to 6,000 miles or once a year, whichever comes first.
Drain the oil when the engine is warm but not hot.
Add the correct amount and grade of oil, run the engine briefly, wait a minute, then check the dipstick and top up if needed.
Keep a quart of oil and an extra filter in your saddlebag. If you need to top off oil on the road, you’ll have it with you. This is one of the simplest ways to prevent engine damage during a long trip.
Service Intervals and Owner’s Manual Guidance
Your owner’s manual tells you exactly what maintenance your bike needs and when.
Check the maintenance schedule, which lists tasks by mileage or time interval. If a service is due before or during your trip, do it now.
Common services include:
- Spark plug replacement every 5,000 to 10,000 miles
- Air filter cleaning or replacement every 5,000 miles
- Coolant flush every 2 years or 12,000 miles
- Transmission fluid change every 6,000 to 12,000 miles
- Brake fluid flush every 2 years
Handle any due services before you leave: a clogged air filter cuts power and fuel economy, and old brake fluid absorbs moisture and loses stopping power.
Motorcycle Road Trip Tool Kit: What to Pack
Breakdowns happen, so pack tools and spare parts for basic roadside repairs.
Essential Tools and Spare Parts
Pack these tools in a small bag or roll:
- Socket set (metric and standard)
- Wrenches (metric and standard)
- Screwdriver set (Phillips and flathead)
- Pliers (needle-nose and standard)
- Adjustable wrench
- Hex key set
- Tire repair kit
- Tire levers
- Hand pump or CO2 cartridges
- Jumper cables or portable jump starter
- Spare fuses
- Spare bulbs (headlight, tail light, turn signal)
- Spare spark plugs
- Spare oil and oil filter
- Spare brake fluid
- Spare coolant
- Spare chain lube
- Spare drive belt (if your bike has one)
- Duct tape
- Electrical tape
- Wire ties
- Spare bolts and fasteners
Most of these items are small, a compact tool roll fits easily in a saddlebag.
Emergency Repair Supplies
Also pack roadside emergency supplies:
- First aid kit
- Flashlight with extra batteries
- Multi-tool
- Tire patches and rubber cement
- WD-40 or penetrating oil
- Rags or paper towels
- Work gloves
- Safety glasses
- Spare chain links (if you have a chain drive)
- Spare clutch cable
- Spare throttle cable
- Gasket maker
- Epoxy putty
- Waterproof matches or lighter
Keep these in a waterproof bag, you won’t need them often, but you’ll be glad you have them.
Motorcycle Touring Packing List and Load Balance
What you carry affects handling: too much weight in the wrong place makes steering harder and tires wear faster.
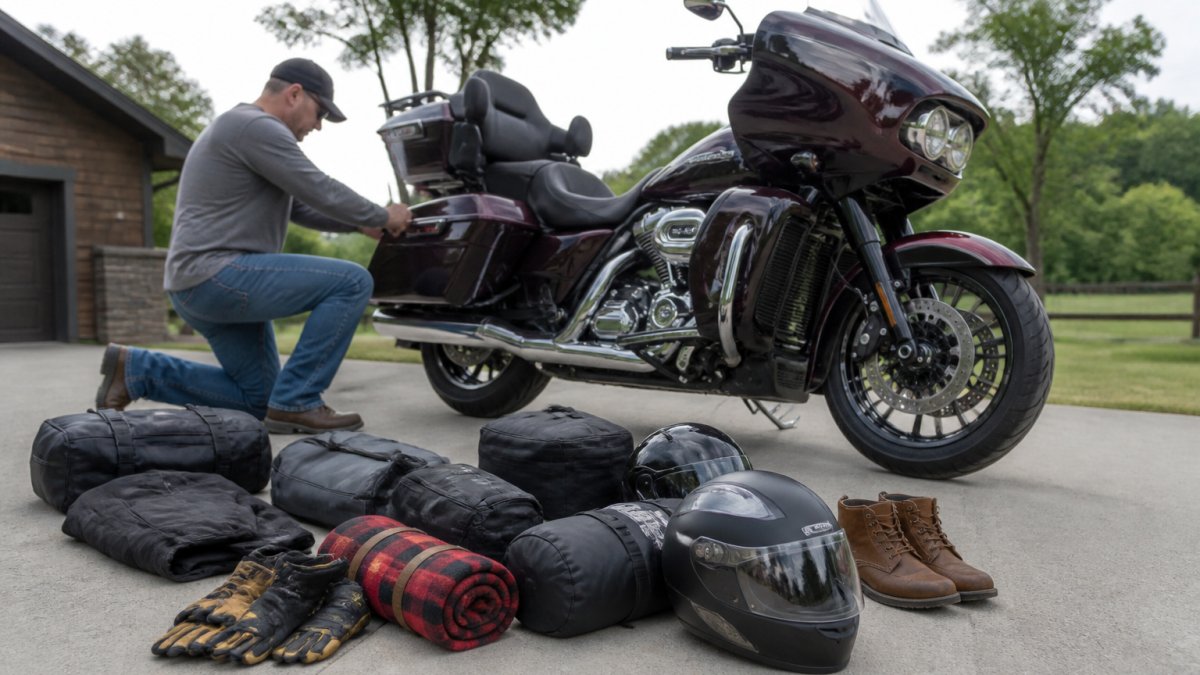
Luggage, Saddlebags, and Weight Distribution
Distribute weight evenly between left and right saddlebags; a heavier side makes the bike unbalanced and pull.
Don’t overload the rear, too much weight lightens the front wheel and reduces steering control.
Check the owner’s manual for weight capacity, which includes you, passenger, fuel, and gear. Don’t exceed it.
Secure all luggage tightly with bungee cords or cargo straps; loose gear shifts and throws off your balance.
Riding Gear and Weather Protection
Pack layers for changing weather across regions.
Pack a warm layer like a fleece or thermal shirt; even summer mornings are cold.
Wear weather-rated gloves: cold hands reduce grip and control, so use breathable summer gloves or insulated winter gloves.
Pack extra socks in a waterproof bag, wet socks are miserable.
Wear ankle-covering boots to protect your feet in a crash and keep them warm and dry.
Comfort Setup and Fatigue Management for Extended Rides
Long rides are hard on your body: discomfort builds into pain, and pain leads to mistakes. Set up your bike for comfort and manage fatigue.
Seat Comfort and Riding Posture
Seat discomfort is a top complaint on long rides.
Adjust posture to reduce strain: elbows slightly bent, wrists neutral, back upright or slightly forward, never twisted.
Set your feet so knees stay slightly bent at full peg extension to reduce leg fatigue.
Adjust any windscreen to cut wind blast on chest and neck, wind fatigue builds over long hours.
A backrest or passenger backrest supports your lower back and reduces fatigue.
The most comfortable position is the one you can hold for hours without strain. Spend time adjusting before you leave. A small change in seat height, peg position, or handlebar angle can make the difference between a great ride and a painful one.
Hydration, Nutrition, and Rest Breaks
Your body needs fuel and water to stay alert. Dehydration and hunger cause fatigue and poor judgment.
Eat small meals or snacks every few hours. Pack protein bars, nuts, or sandwiches.
Break every 2 hours: stop for 15 minutes, get off, stretch, and walk around to restore blood flow.
Sleep well the night before.
Limit caffeine: it gives a short boost then a crash, so drink coffee early, not in the afternoon.
Route Planning, Weather, and Communications
Before you leave, plan your route and check the weather so you know what to expect.
Fuel Stops and Contingency Planning
Use a mapping app to note fuel-stop locations and distances, avoiding the panic of searching for gas on fumes.
Have a backup route with alternate roads and towns in case your primary route closes or congests.
Check the forecast for the entire route and pack accordingly, rain suit for rain, extra water for heat.
Carry a GPS phone with your route pre-programmed and a portable battery pack to keep it charged.
Write down emergency contacts: roadside assistance, insurance, and family.
Preparing to prepare motorcycle long distance takes time, but it pays off with a safer, more enjoyable trip. At Spirit of Indian, we understand the appeal of the open road and the community of riders who embrace it.
Frequently Asked Questions
What should I check on my motorcycle before a long ride?
Start with a pre-ride inspection checklist covering tires (pressure and tread depth), brakes (pads and fluid), fluids (oil, coolant, brake fluid), chain tension, lights, and battery. Check your owner’s manual for model-specific intervals and component wear limits. A shakedown ride around your neighborhood before departure helps confirm everything responds correctly.
How often should I service my motorcycle before a road trip?
Follow your owner’s manual service intervals as your baseline. If your next scheduled service falls within two weeks of departure, complete it early. For trips longer than 500 miles, consider an oil and oil-filter change if you’re near that interval. Check brake pads, coolant level, and chain tension regardless of mileage, these wear unpredictably on long-distance rides.
What tools and spare parts should I carry on a motorcycle trip?
Pack a motorcycle road trip tool kit with basic wrenches, pliers, screwdrivers, a tire repair kit, spare brake pads, fuses, a spare drive belt or chain links (depending on your drive system), spare oil, coolant, and brake fluid. Include a portable air pump, jumper cables or a portable charger, and a headlamp. Roadside repair capability prevents a minor breakdown from ruining your trip.
How should I pack a motorcycle for long-distance travel?
Balance weight evenly across saddlebags and use a touring packing list that prioritizes essentials: riding gear, weather protection, toiletries, and documents. Mount luggage low and centered to maintain handling. Avoid overloading beyond your motorcycle’s suspension limits, check your owner’s manual for load capacity. Secure everything with quality tie-downs and test weight distribution before you depart.

0 Comments