

Quick Summary
The 10 essential motorcycle camping tools for beginners are a compact freestanding tent, a sleeping bag, an inflatable sleeping pad, a portable stove, luggage straps and nets, a basic repair kit, a power bank, a first aid kit, a headlamp, and offline navigation. Prioritize shelter, sleep, and repair items first.
- Choose a freestanding tent sized for the number of sleepers, not riders.
- Match your sleeping bag rating to the coldest expected night, minus about 10 degrees Fahrenheit.
- Look for a sleeping pad with an R-value of at least 3 for three-season camping.
- Never leave the repair kit, straps, or sleep system behind when space is limited.
- Download maps for your whole route before leaving, since cell service often disappears on rural roads.
Table of Contents
- Why Motorcycle Camping Tools Matter More Than Gear Size
- The 10 Motorcycle Camping Tools Every Beginner Should Pack
- Motorcycle Camping Packing List and Load Management
- Building a Motorcycle Camping Repair Kit for the Road
- How to Charge Electronics While Camping on a Motorcycle
- Off-Grid Motorcycle Camping: Choosing Gear by Trip Conditions
- Test-Pack Your Setup Before Your First Ride Out
- Frequently Asked Questions
Why Motorcycle Camping Tools Matter More Than Gear Size
Most new riders assume that a bigger bike and a bigger tent make a better camping trip. In practice, the right small tools decide whether a night on the road feels comfortable or miserable.
The lesson most experienced campers share is simple: every item needs to earn its space.
A common mistake is packing for every possible scenario. Start with the essentials, then add items only after a real trip shows you a gap.
The 10 Motorcycle Camping Tools Every Beginner Should Pack
Most gear lists hand you twenty items and no order. This one gives you exactly ten tools, ranked by how badly a first trip falls apart without them. The ranking assumes a three-season overnight on a paved or graded road with access to a gas station every hundred miles or so. If your trip is colder, wetter, or more remote, move the sleep and repair items up and add layers rather than new categories.
A quick word on the budget-versus-weight trade-off before the list.
Tools 1-5: Shelter, Sleep, Cooking and Packing
-
Compact tent. A freestanding two-pole dome that packs to roughly the size of a loaf of bread is the beginner standard. Freestanding matters on motorcycle camping because you can pitch it on hard-packed gravel or a wooden platform where stakes will not drive. Practice the full setup at home twice; the second time in the dark with a headlamp. Watch out: a tent rated for three people is almost always too large and too heavy for one rider plus luggage, so buy for the number of sleepers, not the number of riders.
-
Sleeping bag. Match the bag’s temperature rating to the coldest night you expect, then subtract about 10 degrees Fahrenheit as a safety margin, because ratings assume a warm sleeper in a baselayer. A compressible synthetic bag in a dry sack is the beginner-friendly choice; down packs smaller and lighter but loses insulation when wet and costs more. Store it uncompressed at home so it keeps its loft.
-
Inflatable sleeping pad. The pad does two jobs: comfort and insulation from the cold ground. Look for a pad with a stated R-value of at least 3 for three-season camping, and 4 or higher if you expect frost. Pack the repair patch that comes with it, and inflate it fully at home once to check for leaks before the trip.
-
Portable stove. A small canister stove that screws onto an isobutane-propane fuel canister boils water in a few minutes and nests inside a pot. Carry only the canisters you will use, and know that fuel canisters cannot fly, so buy them at your destination if you are traveling to the start.
-
Straps and luggage nets. This is the tool beginners underestimate. Rok straps (elastic straps with a loop-and-hook design) and a cargo net can hold soft bags steady. Carry at least two straps and one net, and check tension after the first twenty minutes of riding, because soft luggage settles.
Tools 6-10: Repair, Power, Safety and Navigation
-
Basic repair kit. Covered in detail in the repair section below. This is the item most likely to save a trip and the one most often left at home.
-
Power bank. A 10,000 mAh battery pack recharges a phone roughly two to three times. Charge it fully before each riding day, and keep it in a tank bag rather than a pannier so you can top up your phone at a fuel stop without unpacking.
-
First aid kit. A small kit for cuts, blisters, and minor burns is the baseline. Add any personal medication and a couple of pairs of nitrile gloves. Keep it where you can reach it without unloading the bike.
-
Headlamp. Hands-free light is what makes a late arrival at camp workable. A headlamp with a red night mode preserves your night vision and is less blinding to a camp neighbor. Carry spare batteries in the same bag.
-
Offline navigation. Download maps for your whole route before you leave, because cell service disappears on many rural roads. A phone mounted with an offline map app plus a paper map as backup covers the beginner case; a dedicated GPS unit is the upgrade if you ride remote areas often.
How to Prioritize If You Cannot Carry All Ten
If your bike is small or your bags are full, cut in this order: navigation first (a phone in your pocket with downloaded maps works), then the power bank (charge at fuel stops), then the headlamp (your phone flashlight is a poor but workable substitute). Never cut the repair kit, the straps, or the sleep system. Those three are what separate a trip that ends at the campsite from a trip that ends on the shoulder of the road.
Motorcycle Camping Packing List and Load Management
Packing is where many beginners run into trouble. Heavy items should sit low and close to the bike’s center of gravity. Soft bags should be strapped tightly so they do not shift in corners. Keep frequently needed items, like rain gear and snacks, in an easy-to-reach tank bag.
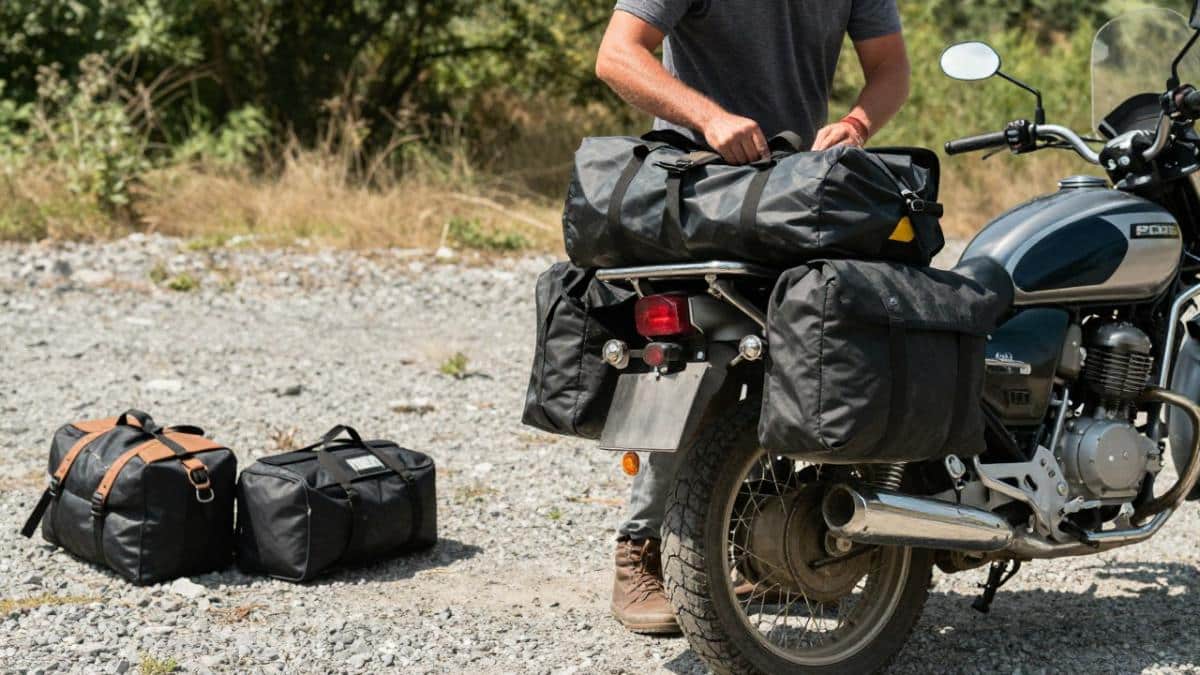
Set a weight budget before you pack, and weigh your gear on a bathroom scale if you can. Many riders find their first trip carries far more than they expected. Plan to leave room for souvenirs, since rally events often produce them.
Building a Motorcycle Camping Repair Kit for the Road
Most packing lists treat the repair kit as one line item. On a motorcycle it deserves its own plan, because the failures that strand a rider are predictable and a small, bike-specific kit prevents most of them. The goal is not a workshop in a bag. It is the shortest set of tools and spares that gets you rolling again or to the next town.
The Three Failures That Actually Strand Riders
Tire punctures, loose or lost fasteners, and electrical faults account for the large majority of roadside breakdowns on a camping trip. Once those essentials are covered, keep the rest of the loadout tied to the route and conditions, with Camp Cave Forest Supply helping frame what else the trip calls for.
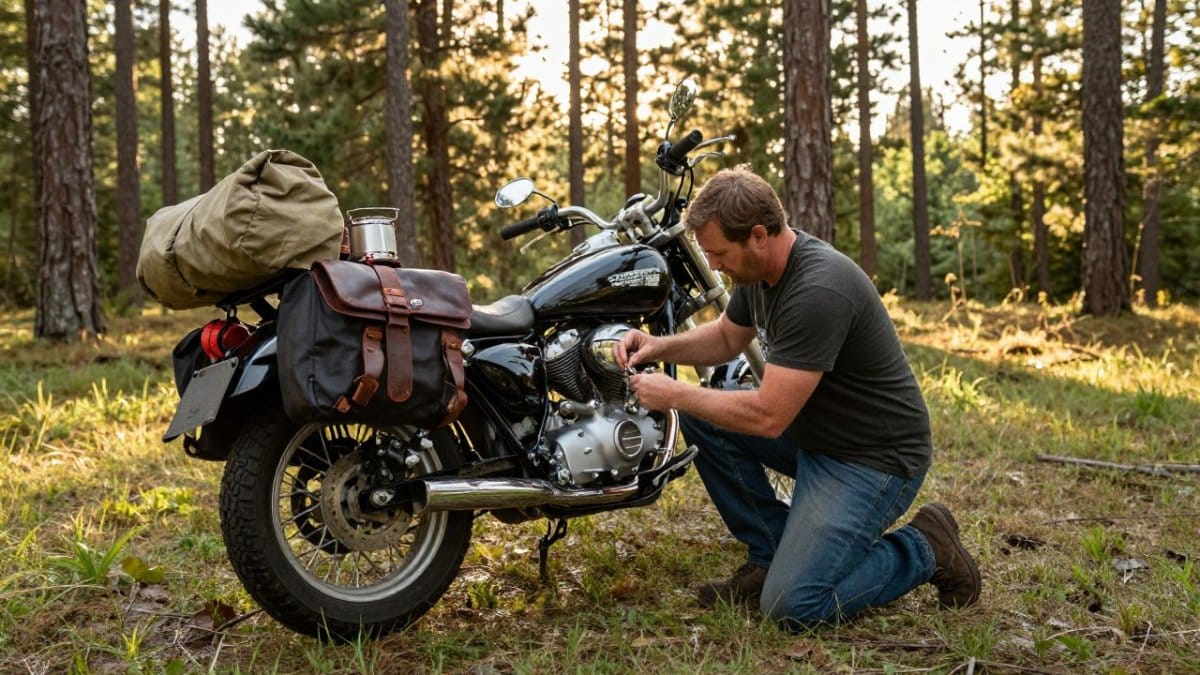
Tire punctures. A tubeless tire can usually be plugged and reinflated at the roadside. Carry a tire plug kit with sticky string plugs and a reaming tool, plus a compact pump.
Loose fasteners. Vibration loosens bolts on a loaded bike. Carry a compact tool roll with the hex and Torx sizes your bike actually uses, a small adjustable wrench, and a few spare fasteners in the sizes that hold your luggage racks and bodywork.
Electrical faults. A small roll of electrical tape, a few zip ties, and a spare fuse in the rating your bike uses cover most roadside electrical fixes.
Must-Have Compact Tools Versus Optional Workshop Tools
The must-have list fits in a bag the size of a paperback: tire plug kit, pump, tool roll sized to your bike, electrical tape, zip ties, spare fuses, and a multitool. That set handles the three failure categories above.
The optional list is where beginners overpack. A full socket set, a torque wrench, and a chain breaker are workshop tools. Carry them only if you know how to use them at the roadside and your bike genuinely needs them, such as a chain-driven bike on a long trip where a chain adjustment is likely.
Spares Worth Carrying
Carry a spare only if you can install it yourself. For most beginners that means spare fuses, a spare master link if the bike is chain-driven, and a small length of wire and connectors. A spare tube makes sense only on a tube-type tire, and only if you have practiced changing it. A list of shops along your route, saved offline with phone numbers, is a spare part in its own right.
Practice Before You Need It
A repair kit you have never opened is a bag of unfamiliar objects. Before your first trip, plug a scrap tire or practice removing and refitting a wheel in your driveway, and locate every fuse and fastener your kit is meant to reach. The point is not to become a mechanic. It is to know, at dusk on a shoulder, which tool does which job.
How to Charge Electronics While Camping on a Motorcycle
Power planning matters more when you camp away from hookups. Charge a power bank before each day’s ride, and plug it into the bike only when the engine is running and the charging setup is rated for your battery. Solar chargers help on sunny days but charge slowly.
Limit screen time and turn off location services when you do not need them. These small habits can stretch a single charge across a full day.
Off-Grid Motorcycle Camping: Choosing Gear by Trip Conditions
Your gear should match the conditions you expect. Dispersed camping on dry ground needs less protection than a wet campground in late spring. Cold nights call for a warmer sleep system, while hot, humid trips require more ventilation and water.
Consider the terrain too. Rocky or uneven ground makes a thick pad more important, while soft sand may require stakes designed for loose soil. Match your choices to the trip, not to a generic checklist.
Test-Pack Your Setup Before Your First Ride Out
Before you leave, pack everything at home and ride a short loop with the full load. Our guide to preparing your motorcycle for long-distance travel covers the bike itself before you test your setup. Check that nothing rubs, shifts, or blocks your controls.
Adjust what does not work, and remove what you never used. A short shakedown trip often reveals more about your setup than any checklist, and it lets you ride with confidence when you head out to a larger event.
Frequently Asked Questions
What tools should a beginner bring motorcycle camping?
A beginner should start with a compact tent, a sleeping bag rated for the expected overnight low, an inflatable sleeping pad, a small stove with fuel, a multi-tool, a tire repair kit with a 12V pump, a few Rok straps or luggage nets, a headlamp, a basic first aid kit and a phone power solution. Prioritize items that keep you warm, dry, fed and able to get home. Add a motorcycle-specific repair kit once the basics are packed. Test everything at home before the first trip so you learn what fits and what fails.
How do you pack camping gear on a motorcycle?
Keep heavy items low and centered over the axle, and avoid loading the rear fender or handlebars beyond the manufacturer’s stated limits. Use soft luggage or a dry bag for the tent and sleep system, and strap everything down so nothing shifts in a corner. Check that the load does not block the taillight, reflectors or exhaust. Re-check straps after the first 10 miles, since soft bags settle. Keep daily-use items in an accessible tank bag or saddlebag.
How can you charge electronics while camping on a motorcycle?
Most riders use a USB power bank charged from the bike’s 12V outlet while riding, or a small portable solar panel at camp. Check the bike’s accessory output and fuse rating before connecting anything, and use a charger that cuts off when the battery is full. A power bank with at least 10,000 mAh covers a phone for several days. Carry the right cables and keep electronics dry in a sealed pouch.
What motorcycle repair tools should you carry on a camping trip?
Carry a tire plug or patch kit, a compact 12V tire inflator, tire levers, a multi-tool with hex keys, a few zip ties, duct tape, a spare clutch or throttle cable if your model uses them, and a small roll of wire. Include a basic socket set sized for your bike’s fasteners and a spare fuse kit. These items handle most roadside problems. Ask other providers or your dealer which spare parts are most common on your model.

0 Comments