

Last Updated: November 7, 2026
Quick Summary
To restore vintage Indian fenders, inspect the metal first to decide between repair and replacement, then clean all grease, remove every trace of rust, reshape dents with hammer and dolly, weld cracks and split seams, and finish with historically correct paint. Photograph original details before metalwork, and replace any fender with separated seams, thin metal, or cracked mounting tabs.
- Run a magnet along every seam and probe thin areas with a pick to find hidden rust.
- Degrease and strip old wax before sanding, or primer will lift weeks later.
- Cracks and split seams need welding, not body filler.
- Apply body filler in thin coats only after the metal is close to shape.
- Match paint color and sheen to your model year for a historically correct finish.
Table of Contents
- Step 1: Inspect the Fender and Decide Repair or Replace
- Step 2: Clean Dirt, Grease, and Old Residue
- Step 3: How to Fix Rusty Motorcycle Fenders
- Step 4: Motorcycle Fender Dent Repair and Metal Reshaping
- Step 5: Body Filler, Sanding, and Surface Blending
- Step 6: Repainting and Refinishing for a Historically Correct Look
- Step 7: How to Restore Faded Plastic Motorcycle Fenders
- Bring Your Finished Indian to the Spirit of Indian Rally
- Frequently Asked Questions
Step 1: Inspect the Fender and Decide Repair or Replace
Learning how to restore vintage Indian fenders starts with an honest inspection, not with a wrench. A vintage Indian fender is a stressed structural panel, not just trim.
Start by pulling the fender off the bike and getting it onto a clean bench under strong light. Support the fender so it cannot rock or fall while you probe it; a padded stand or a pair of soft-jawed clamps keeps the panel stable and your hands free.
Checking Seams, Spot Welds, and Metal Thickness
Vintage Indian fenders were commonly built from stamped steel. Those joints are where trouble often hides.
- Run a magnet along every seam. It should grab evenly.
- Look for hairline cracks radiating from spot welds.
- Probe thin or pitted areas with a pick. If it punches through, the metal is gone.
- Check the mounting holes and stay tabs for elongation or cracking.
- Flex the fender gently by hand. A soft, oil-canning feel at a seam means the joint has lost integrity.
A common mistake is judging a fender by its paint. Rust often works from the inside out, so a fender that looks solid on top can be paper-thin underneath. Look at the backside of every seam and the underside of the crown, where road spray collects.
Safety and Structural Inspection
Some damage makes a fender unsafe to reuse no matter how good the cosmetics look. Stop and reassess if you find any of the following:
- Cracks that run across a mounting tab or through a stay attachment point.
- Seams that have separated along more than a short section.
- Metal that flexes visibly when you press it with a thumb.
- Corrosion that has eaten through the crown or the area around a mounting hole.
A fender that fails these checks can still be saved as a display piece, but it should not carry road loads. If you are unsure, have a fabricator or experienced restorer look at it before you invest in paint.
Model- and Year-Specific Construction
Vintage Indian fenders are not all the same, and the repair method has to match the construction. Construction can vary by model and year, so identify your fender’s construction before choosing a repair method. Before you choose a repair method, identify your fender’s construction: steel or plastic, seamed or one-piece, and how the stays attach. That determines whether welding, hand reshaping, or replacement is realistic.
Indian Motorcycle history and model archive
When Replacement Parts Make More Sense Than Repair
Repair wins when the damage is surface-level: dents, light rust, faded paint. Replacement wins when the fender has lost its structure.
Replacing is the smarter call when:
- The seams are separating and the metal is too thin to weld.
- Multiple mounting tabs are cracked or missing.
- The fender is twisted beyond what a hammer and dolly can correct.
If you’re still deciding whether your fender is worth saving, it helps to understand the model’s history and how these bikes were built. Our deep dive into the Indian Motorcycle story gives you that context.
| Condition | Repair | Replace |
|---|---|---|
| Surface rust, faded paint | Yes | No |
| Dents without creasing | Yes | No |
| Separated seams, thin metal | No | Yes |
| Cracked mounting tabs | Maybe | Often |
| Twisted fender body | No | Yes |
Choosing a Repair Method by Damage Type
Use this decision guide to pick the method before you start work:
- Light surface rust: hand sanding or media blasting, then rust converter and primer.
- Pitting: grinding back to bare metal, treating, and filling only after the metal is sound.
- Shallow dents: hammer and dolly, then a thin skim of filler to blend.
- Creased or stretched dents: hammer and dolly with heat control, possibly shrinking, before filler.
- Cracks and split seams: welding, not filler.
- Separated seams or thin metal: welding if the metal will take it, otherwise replacement.
- Cracked or missing mounting tabs: fabrication and welding, or replacement if the tab area is compromised.
Matching the method to the damage type generally saves time over trying one technique on every problem. If a repair would require welding on metal that is already thin, replacement is usually the better investment. Once the replacement is fitted, take care to remove old decals without disturbing the surrounding paint.
Step 2: Clean Dirt, Grease, and Old Residue
Cleaning is the step most people rush, and it’s the one that ruins paint jobs later. Grease, road grime, and old wax hide damage and stop filler and paint from bonding.
Work in this order:
- Scrape off heavy grease with a plastic scraper.
- Wash with a degreaser and a stiff brush.
- Rinse and dry completely.
- Wipe the surface with a wax and grease remover before any sanding.
Watch out: sanding before degreasing just grinds oil into the metal, and your primer will lift weeks later.
Step 3: How to Fix Rusty Motorcycle Fenders
If you’re learning how to fix rusty motorcycle fenders, the rule is simple: remove all of it, or it comes back. Rust is corrosion that eats into the steel, and paint won’t stop it once it’s started.
Rust Removal and Metal Treatment
- Wire-brush or media-blast light surface rust.
- Grind pitted areas back to bare, shiny metal.
- Treat the cleaned steel with a rust converter or phosphoric acid wash.
- Neutralize and dry fully before priming.
A common mistake is painting over rust “just to seal it.” It never seals. It traps moisture and the rust spreads under the finish.
Step 4: Motorcycle Fender Dent Repair and Metal Reshaping
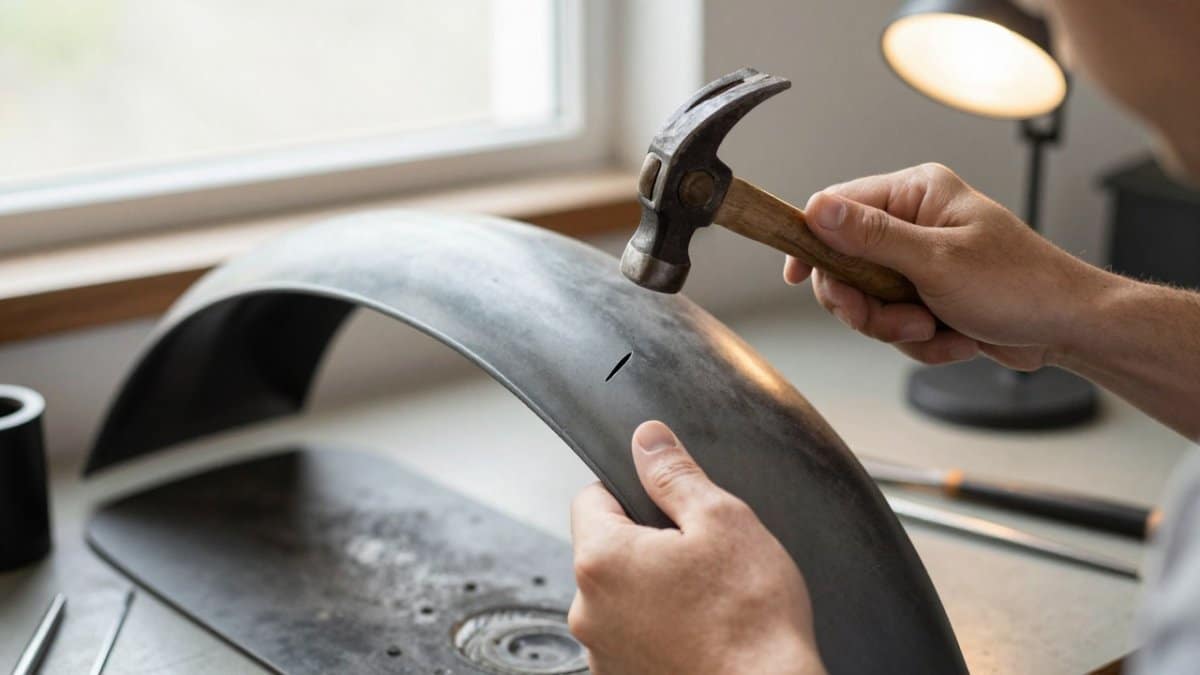
Motorcycle fender dent repair is about moving metal, not hiding it. Filler over a deep dent will crack. You need to push the steel back close to its original shape first.
Tools and Method Selection
Match the tool to the damage, not the other way around:
- Hammer and dolly: general dent removal and smoothing.
- Slapping file or pick hammer: working out low spots and checking shape.
- Body hammer with a shrinking head: stretched metal around creases.
- Stud welder or slide hammer: pulling dents where you cannot reach behind the panel.
- Welder: cracks, split seams, and tab repairs.
- Body filler: only after the metal is close to shape.
Start from the outside of the dent and work inward. Use a dolly behind the panel and a hammer on the face. Tap in small circles. Feel the surface with your palm as you go. The metal should move in tiny steps, not big hits. Check your progress against the fender’s curve with a flexible straightedge or a profile gauge.
Welding Cracks, Fractures, and Separated Seams
Cracks and split seams need welding, not filler. Clean the area to bare metal, open the crack slightly, and tack-weld in short passes to control heat. Let the metal cool between passes to avoid warping.
Watch out: welding on metal that is already thin or heavily pitted can blow through and make the repair worse; if the seam will not take a tack, stop and reassess whether the fender should be replaced.
Preserving Original Details
Before you restore vintage Indian fenders by reshaping or welding, photograph the fender’s original shape, seam placement, and trim holes. Original details are hard to recreate once the metal moves. If the fender is a candidate for preservation rather than full restoration, work conservatively and avoid removing original finish from areas that do not need repair. Documenting original details also helps you choose a historically appropriate finish later.
Step 5: Body Filler, Sanding, and Surface Blending
Body filler is for smoothing, not for rebuilding. Apply thin coats over clean, bare metal or primer. Spread it wider than the repair so you can blend the edges.
- Sand with coarse grit to shape.
- Step up to finer grit to blend.
- Guide-coat the surface to spot high and low spots.
- Repeat until the panel feels flat under your hand.
Step 6: Repainting and Refinishing for a Historically Correct Look
A historically correct finish means matching the original color, sheen, and paint style for your model year, not picking a color you like. Research your bike’s original scheme before you buy paint.
- Prime bare metal with an etch or epoxy primer.
- Block-sand the primer flat.
- Apply color in thin, even coats.
- Finish with the correct sheen, matte or gloss, for the era.
If you want more finishing and care guides, our motorcycle restoration blog has more articles like this one.
Step 7: How to Restore Faded Plastic Motorcycle Fenders
Not every fender is steel. Later bikes used plastic, and how to restore faded plastic motorcycle fenders is a different job. Plastic can fade and chalk from sun exposure.
- Wash and degrease the panel.
- Wet-sand lightly to remove oxidation.
- Polish with a plastic compound.
- Seal with a UV-protective wax or trim dressing.
Watch out: heavy sanding on plastic burns through the surface layer fast. Keep it light.
Bring Your Finished Indian to the Spirit of Indian Rally
You’ve done the work. Now show it off. A restored vintage Indian deserves a ride with people who understand what went into it.
Spirit of Indian is a week-long rally built for Indian owners and their families, held at River’s Edge Campground. You can grab your Spirit of Indian 2027 ticket and read up on the full rally experience before you plan the trip.
Restoring a vintage Indian fender takes patience, the right tools, and a willingness to do each step in order. Whether you’re finishing your first fender or your fifth, Spirit of Indian is where that work gets celebrated.
Frequently Asked Questions
How can I tell whether a vintage Indian motorcycle fender can be repaired or needs replacement?
Check the metal thickness around seams and spot welds. Surface rust and shallow dents are repairable, but metal that crunches under finger pressure or has holes at the seams usually needs replacement. Compare the cost of a used or reproduction fender against the hours of welding and filler work. If more than a third of the fender is compromised, replacement is often the faster route, especially for a rider who wants the bike back on the road this season.
What tools and materials do I need to restore a vintage Indian motorcycle fender?
You will need a wire brush or stripping wheel, rust converter, hammer and dolly set, body filler and spreaders, sandpaper in several grits, primer, and paint matched to the original finish. Add a welder for cracks or separated seams and a respirator for paint and solvent work. For plastic fenders, include a hairdryer or heat gun, fine polishing compound, and a plastic-safe cleaner. Gather everything before you start so the fender does not sit half-sanded for weeks.
How do I fix rusty fenders on a vintage Indian motorcycle without damaging good metal?
Start with the least aggressive method. Scrub light surface rust with a wire brush or fine abrasive, then apply a rust converter to the pitted areas so the remaining corrosion stops spreading. Grind only where the metal is sound underneath. If rust has eaten through a seam or spot weld, cut back to clean metal and patch or weld it rather than covering it with filler, which will bubble again within a season.
How can I preserve original paint and patina during fender restoration?
If the paint is mostly intact and you want to keep the original finish, skip full stripping. Clean the surface, remove loose rust, and touch in bare spots with a matching color, then seal with wax or a clear coat made for patina. Restrict sanding to damaged areas and mask off decals and trim. This approach keeps the fender historically appropriate.


0 Comments